Beginning to Play With Mud
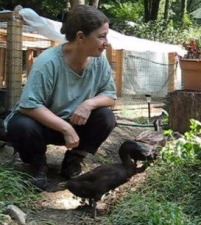
Finally! Today I assembled the materials and equipment I have been collecting to begin learning how to make and apply simple, natural paints. I combined equal amounts of wheat paste, clay slip, and fine sand, along with a slaked tablespoon of natural pigment. Those of you who are already familiar with this process may be laughing already, but I am learning and sharing. As I write this, the paint has yet to dry. But I can tell you that from the point of view of something that just feels good to do, this project is a delight! Obtaining the ingredients was not particularly fun, nor was it particularly ugly. I met two very lovely people, found an inexpensive and helpful book, and gained even more appreciation of the work and teaching done by Sigi Koko, the inspiration for this project. Check out the Year of Mud here – Sigi Koko Year of Mud Once I had what I needed – clay slip, sand, natural pigment and cheap wheat flour, a painter’s sponge and cheap paintbrush and a three gallon bucket, the fun began. I made the wheat paste by adding a mixture of well-mixed wheat flour and cool water into some boiling water. Then I checked the instructions for the nth time and saw that the pigment needs to be slaked. That means soaked in cool water overnight. Then I realized I had put the pigment away someplace clever. Sigh. The wheat paste was stored in a plastic container in the refrigerator for a day or two. Late this morning, I cracked the case, found the pigments, guessed how much I would need, chose a color, put a tablespoon of it in a ramekin with what I know was too much water (doesn’t need much, let me tell ya), and tried to keep myself busy for a while. So – the instructions are to slake the pigment overnight. Hmmm, four hours is nearly overnight, right?? I admit, I could not wait. As Sigi Koko explained, I added equal parts (about 1 and a half cups each) of well-mixed clay slip, wheat paste, and fine sand into a three gallon bucket and mixed and stirred till it was all the same consistency, about that of creamy peanut butter. Then I poured the extra water off the pigment, and added that to the paint and stirred and stirred. I grabbed the paint brush and headed to the basement/barn. I had already prepped the wall as much as I was going to prep it. It was bare drywall in the basement – seems like a good learning surface to me, and the ducks were happy to have my company. Working with this paint was a dream. I just love how it looks, smells (hardly at all, just wet clay), and feels (yes, I got my fingers in it). I spread it over the wall, following instructions as best I could. It went on as smoothly as I expected it would. I even had enough paint (with just a half cup extra) to cover the entire prepared surface, about 16 square feet (I need to double-check that estimate). One coat. I’ll need to go over it again at least once. As you can see, the wall went from old drywall pale brown to wet clay paint gray. An improvement right there! I know the clay will dry to a light gray. How green it will be is a guess, but I think not very. And that is fine. The experience of mixing and applying the paint were worth the effort. As I keep practicing, the results will become more beautiful, I am sure. Speaking of beauty, I cannot tell you how beautiful that paint is. It has a depth and a visual texture to it that I have never seen with commercial paint. Knowing I prepared it also adds to the joy, certainly. There are some considerations when using this paint. First, it won’t work well with a roller. It’s more like – as I wrote above – peanut butter than cream. And I have read that one can accidentally apply too much pressure, or apply the second coat too soon, and end up wiping some of the applied paint off. But for the first coat, I had no problems, and I did not have to worry about being near the ducks. There are no ugly fumes for them to inhale. Or for me to inhale, now that we mention it. There is a risk, however, in working with anything dusty, and in my case this time it was the fine sand. I wore a cover over my face, glasses, and was very very careful not to toss the sand around. Same with the pigment. If I had used powdered clay, same precautions would apply. But I will be able to pour the rinse water out tomorrow on the compost pile (in the sub-freezing weather we are having this weekend. Sigh) and not worry about it, because wheat paste, sand and rock dust are not a problem in compost. And that final piece, there, not needing to be concerned about what’s left, is perhaps nearly half the reason I am learning how to do this. How many projects do we undertake that involve loading the trash bin up with plastics and whatnot that go to the landfill? I did not bat 1000 today. I will have a plastic bag and a plastic jar and a wax and paper carton to toss when I have used all the clay, pigment and sand. But I can burn the paper that the flour is wrapped in and reuse the paint brush and bucket. And I won’t have to open a metal and plastic paint can to let the latex paint dry up before taking that to the transfer station. I asked a while back (need to check again), and could not find a program that takes latex paint around here. I know they exist, but not nearby. | ||||||
